Recreating My Room with Three.js
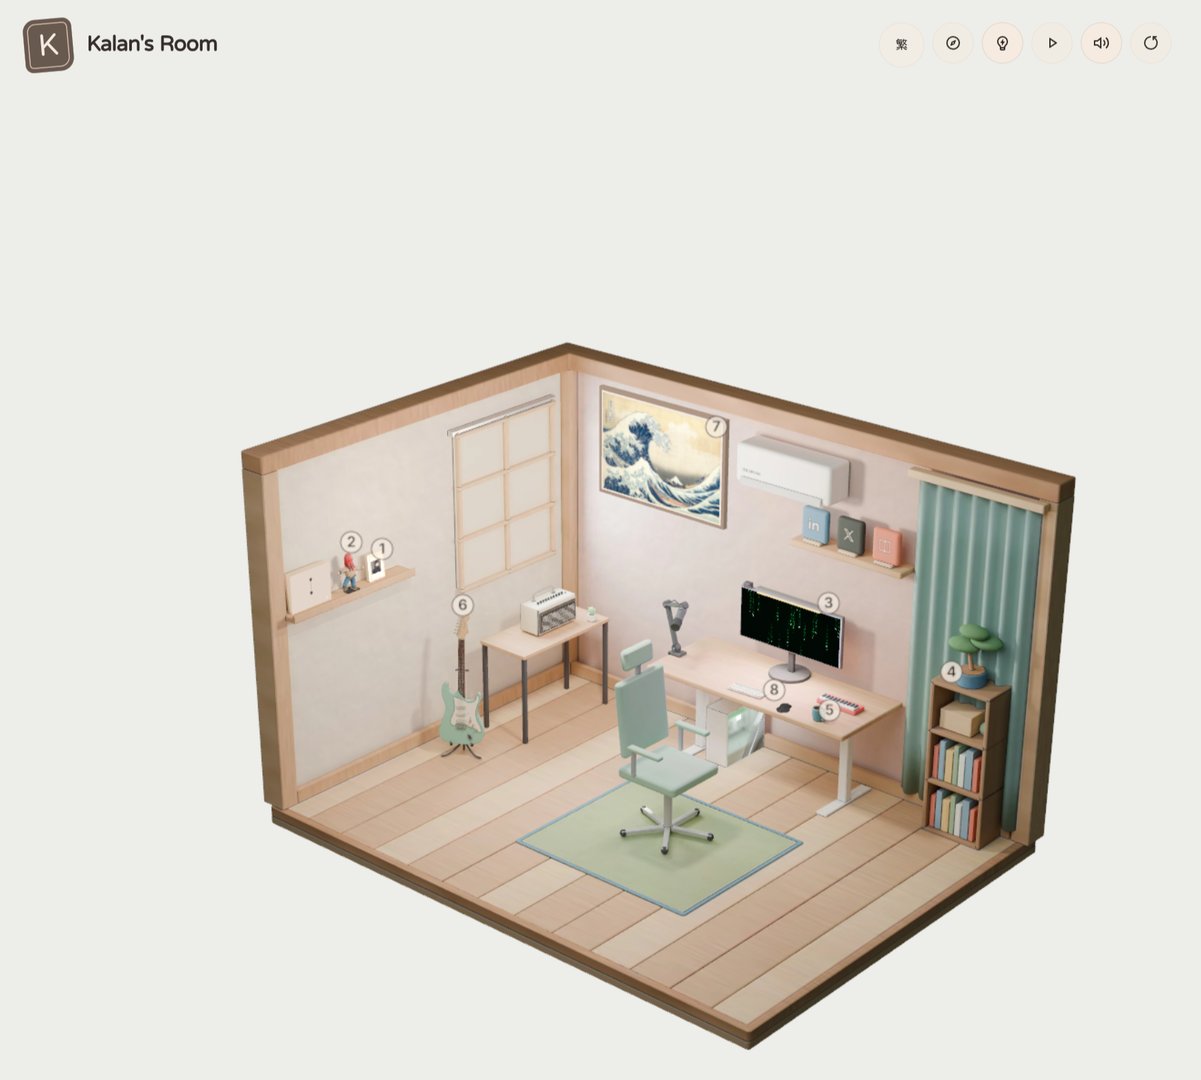
GPT-6 Astra has been released. I remember it was the morning of September 5th. I woke up in the middle of the night to use the bathroom, glanced at the time and notifications on my phone, and discovered that GPT-6 was out. OpenAI even highlighted its ability to operate Blender. Right after finishing in the bathroom, I rushed to my computer to build a demo, finally bringing to life a project I’d wanted to do for a long time: an interactive self-introduction built around my own room.
Using Blender for rendering and baking, I had an initial version of the room’s scene and interactions up and running in about two hours. To be honest, I was astonished. Previously, even though multimodal models existed, accurately recreating something to a showcase-ready level was still a far cry from reality. But now, getting impressive results in a single shot is possible. All that was left was fine-tuning and rewriting the copy.
GPT-6’s fidelity is remarkably high, and it has an excellent grasp of 3D scenes. The coffee steam, the Matrix animation, and the paper-wrinkle shader were all implemented by the model after I simply described the effects I wanted.
Another experiment was using TSL. TSL (Three.js Shading Language) is a syntax designed to make Three.js compatible with both WebGPU and WebGL, and writing it is far more developer-friendly than raw shaders or WebGPU. TSL automatically detects whether the browser supports WebGPU and falls back to WebGL if needed. Since the syntax shares similarities across both, it’s very easy for language models to transfer knowledge to it.
In this post, I’ll walk through my approach. The overall architecture looks roughly like this:
- Model the room in Blender and pre-bake lighting and shadows into texture materials
- Use Three.js for camera transitions, model rendering, and interactions
- Add thoughtful touches to make objects in the scene clickable
1. Taking Photos
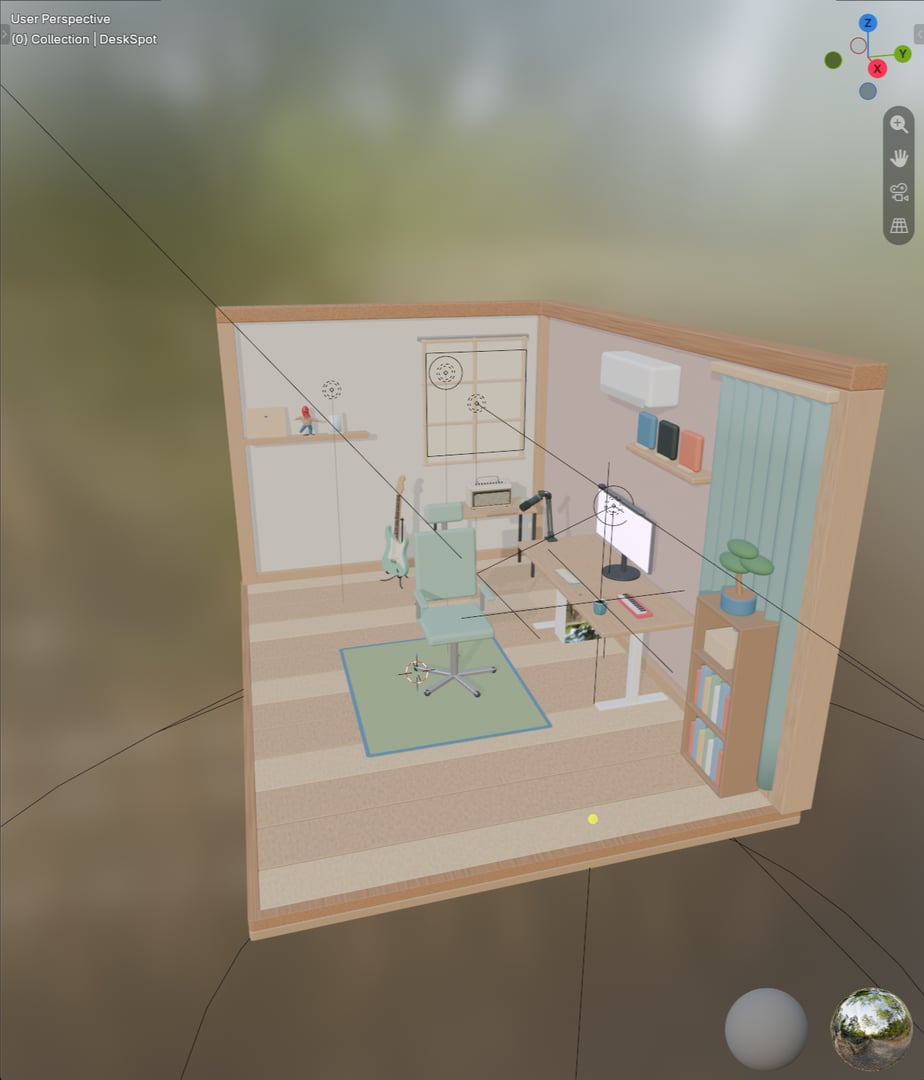
The first step was taking photos. I photographed my room and asked Codex to call the Blender MCP directly to model the space. The very first version looked like this:
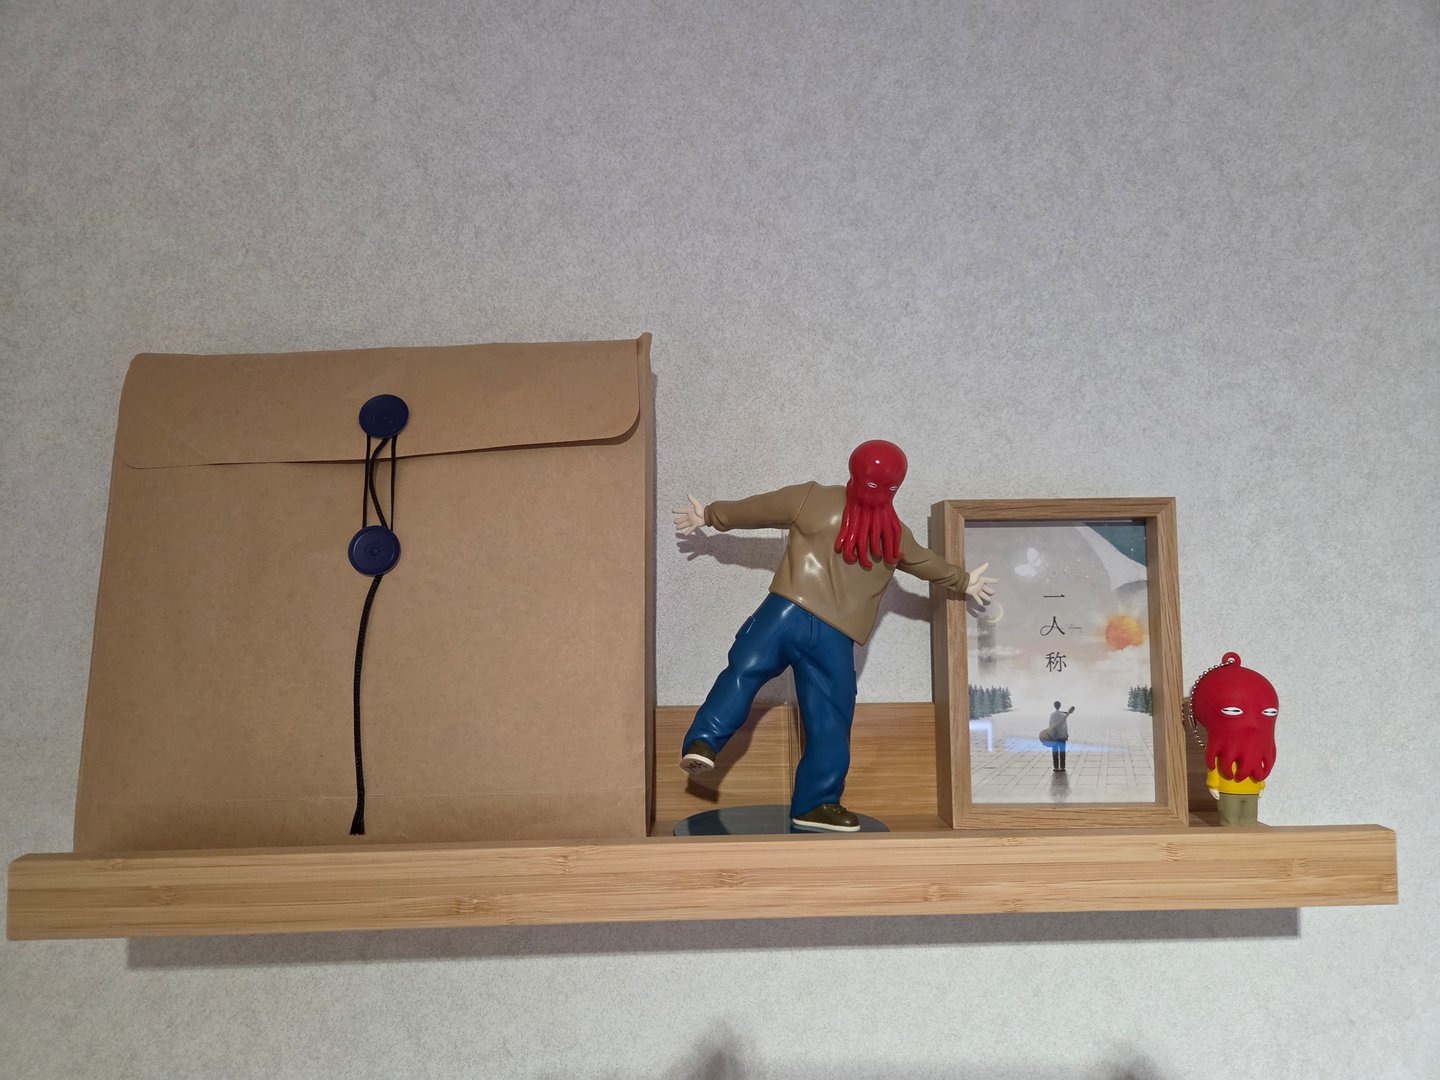

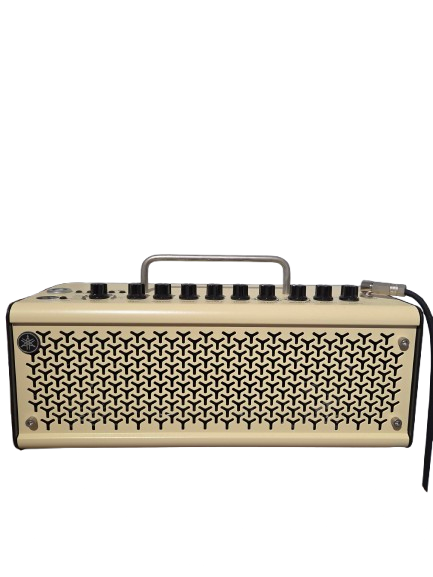
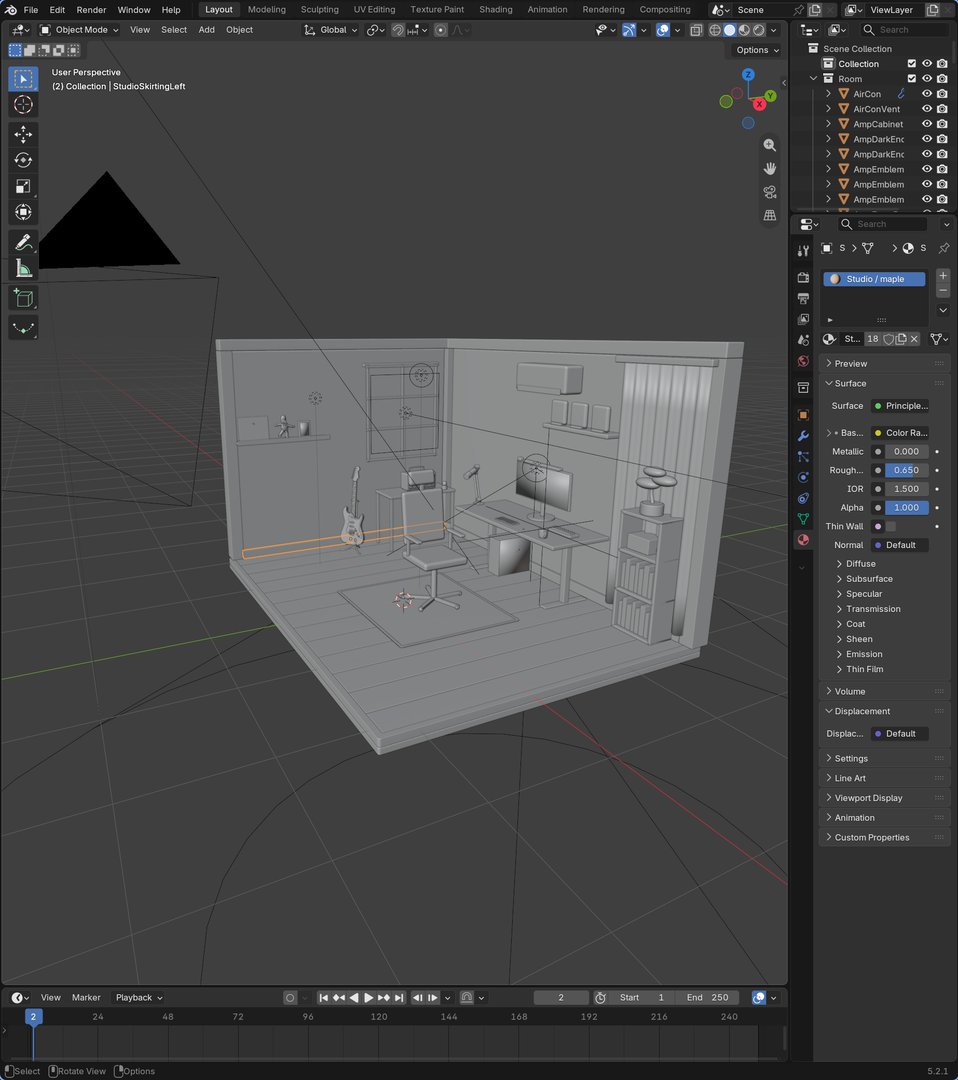
The room’s rough shape turned out surprisingly decent, and all the layers in the scene were properly named! This made it very easy for a human to step in and make adjustments.
Next came shading and coloring, again handled via the Blender MCP. GPT-6 Astra could understand the colors from the photos. I then added a few personal touches on top, like placing three cubes on the shelf to link to social media profiles.
2. UV Unwrapping and Light Baking
Once the scene was built, a few more steps were required before rendering it on the web:
UV Unwrapping
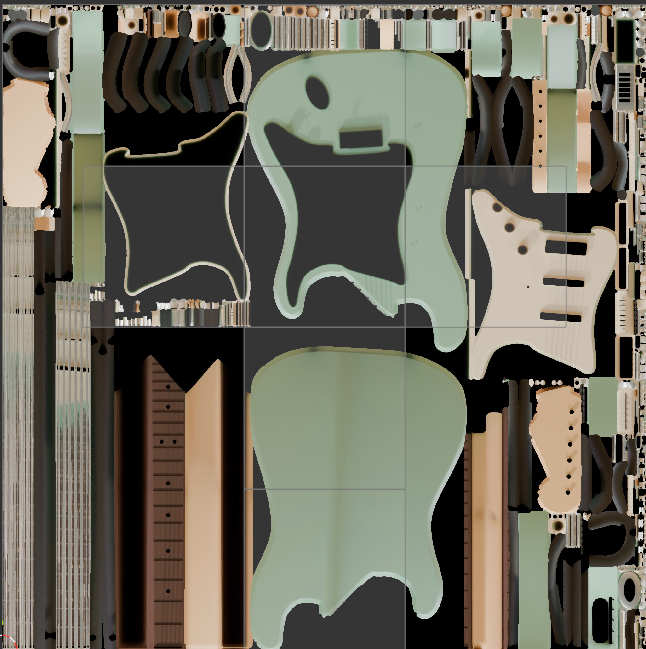
Rendering a 3D object on a computer can be thought of as mapping a 2D texture onto a 3D mesh in a specific way—a process known as UV mapping.
Imagine cutting open a 3D cardboard box along its edges and flattening it out into a cross-shaped 2D sheet: that flattening process is unwrapping. Mapping wrapping paper back onto the box according to those coordinates is mapping / wrapping.
For example, here is the UV unwrapping of my guitar. From what I understand, UV unwrapping is one of the most tedious steps in 3D modeling, but pairing it with AI simplifies the task considerably.
That said, this is also where my lack of domain expertise showed: I have no idea whether this UV unwrapping is technically “good” or “bad.” All I know is that the final visual result looked pretty solid.
Baking Lights
Three.js offers plenty of light APIs to calculate lighting and shadows dynamically. However, dynamic lighting calculations are usually performance-heavy, so right from the start, I instructed the AI to bake everything instead of using Three.js dynamic lights. Baking refers to the technique of precomputing computationally expensive lighting and shadows and “painting” them directly onto the model’s texture maps.
Because everything is calculated beforehand, you can preserve the more realistic lighting, reflections, and shadows produced by rendering software. The trade-off is that since lighting and shadows are baked in, they can’t dynamically adapt if objects move.
3. Interactions
Next was making objects interactive. To allow objects to respond to real user I/O, you can use raycasting to convert mouse coordinates and determine whether an object is being intersected. Because of this, I had separate meshes created for each object in the room. The detection logic itself was also written by the AI; I simply instructed it to use Three.js’s raycasting APIs for hit detection.
Then came the details I added myself:
- Slight object displacement on hover, and sound effects on click
- A Matrix-style animation on the computer screen—running in Japanese!
- Steam rising from the coffee mug
- A wrinkled-paper effect for the manuscript paper
- Camera transitions when clicking each object
- Every interaction can be navigated via keyboard and indexed guides
- Support for three languages: Traditional Chinese, English, and Japanese
- Pressing ESC mid-camera transition smoothly transitions from the current position instead of abruptly snapping back
- Support for reduced motion: animations like steam and screen effects stop automatically when enabled
- Some users enable this on computers or phones to reduce discomfort from animations
- Mobile UI and interactions specially optimized
- A “Fender” logo on the guitar
While adding these details, I realized that even though base model capability has improved dramatically, polish still requires manual intervention—you can’t just prompt it with “Make it better.” How do you spot these subtleties? It comes down to cultivated taste and experience built up over time.
Just as someone like me, with virtually zero background in Blender and 3D modeling, likely missed plenty of minor details that 3D professionals would consider second nature.
4. The Result
Although GPT-6 did the heavy lifting, polishing these nuances still took me nearly two days—including writing the copy, because GPT-generated copy is honestly terrible.
Here are a few snapshots from the result:
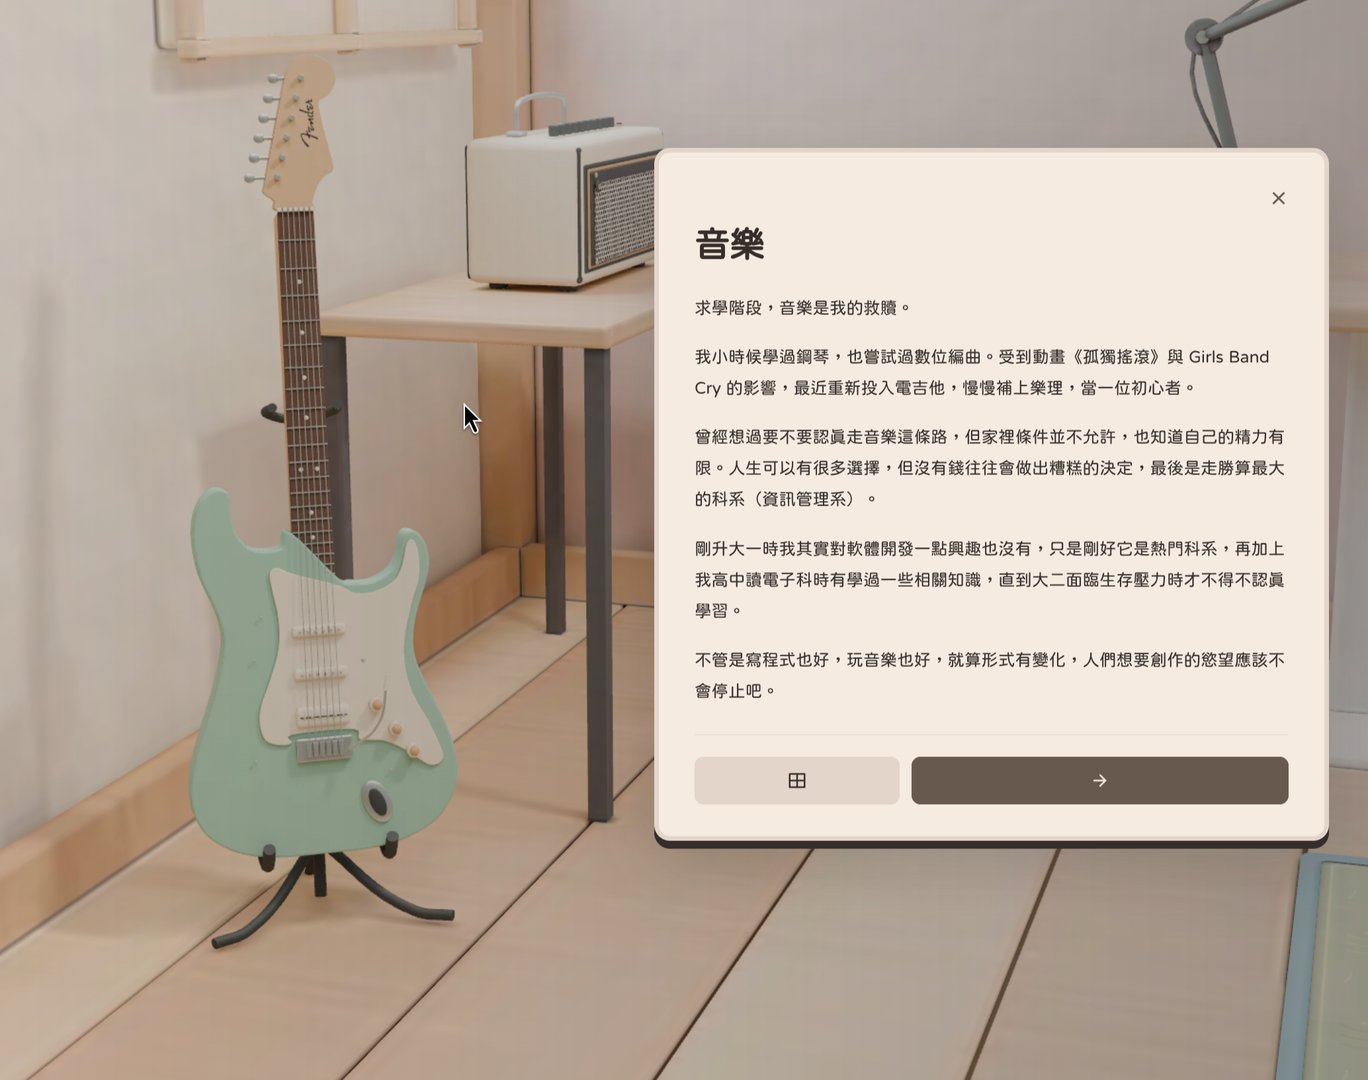



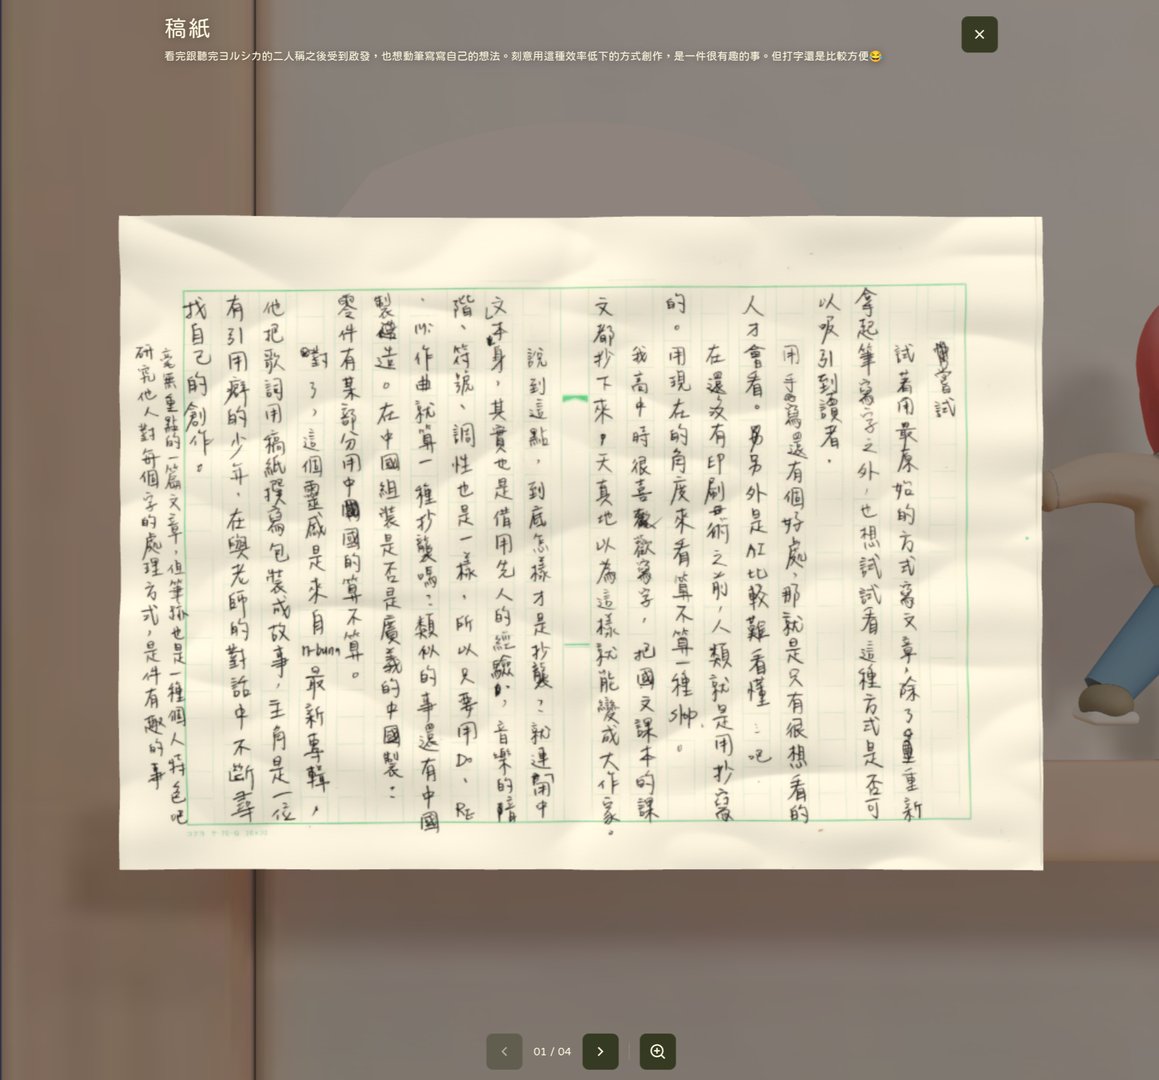
The easiest trap to fall into with interactive portfolios like this is getting so caught up in the visuals that you neglect information delivery. My original goal was simple: to share my personal space, letting visitors discover who I am and what inspires me through exploring the objects in my room.
Reflections
This was a project I’d thought about for a long time but never actually started. Perhaps models like Fable5.1 were already capable enough, but it simply hadn’t crossed my mind until GPT-6 came out and gave me that spark: “Oh wait, I can finally build this now!”
Software development has changed dramatically since 2024. Especially around June 2025 last year, nearly every major model update seemed to upend previous workflows.
In an era where AI is evolving at breakneck speed, I once thought about checking out and walking away. But now I see it differently. Even if you’re not an engineer inside a frontier AI lab, being able to actively ride this wave—to witness, experiment, and create things along the way—is a once-in-a-lifetime opportunity. It would be a real shame to jump ship now.
Feel free to visit my room at room.kalan.dev!
Related Posts
- Things to Keep in Mind When Using Images in Frontend Development Expanding on Jake Archibald's article, this post organizes how modern responsive images should be written: why width/height are still necessary, when to use CSS aspect-ratio, how to choose between AVIF and WebP, and using picture/source/srcset for art direction on mobile devices.
- CSS field-sizing — Auto-resize Form Elements with a Single Line of CSS Previously, auto-resizing a textarea required listening to scrollHeight in JavaScript. With CSS field-sizing: content, a single line replaces it all, supporting textarea, input, and select. This article covers the pain points of older approaches and how to use field-sizing.
- Make Your Link Underlines Look Better: text-underline-offset By default, underlines sit very close to the text. Some designers dislike this look, and personally, I don't think it looks great either.
- Why the Web Shouldn't Strive for Pixel Perfection You should only focus on pixel perfection when it truly matters; otherwise, it often results in a lose-lose situation.